Upload image

JPEG · PNG · WebP · 20 MB · 4096 × 4096 px

Settings
Private image
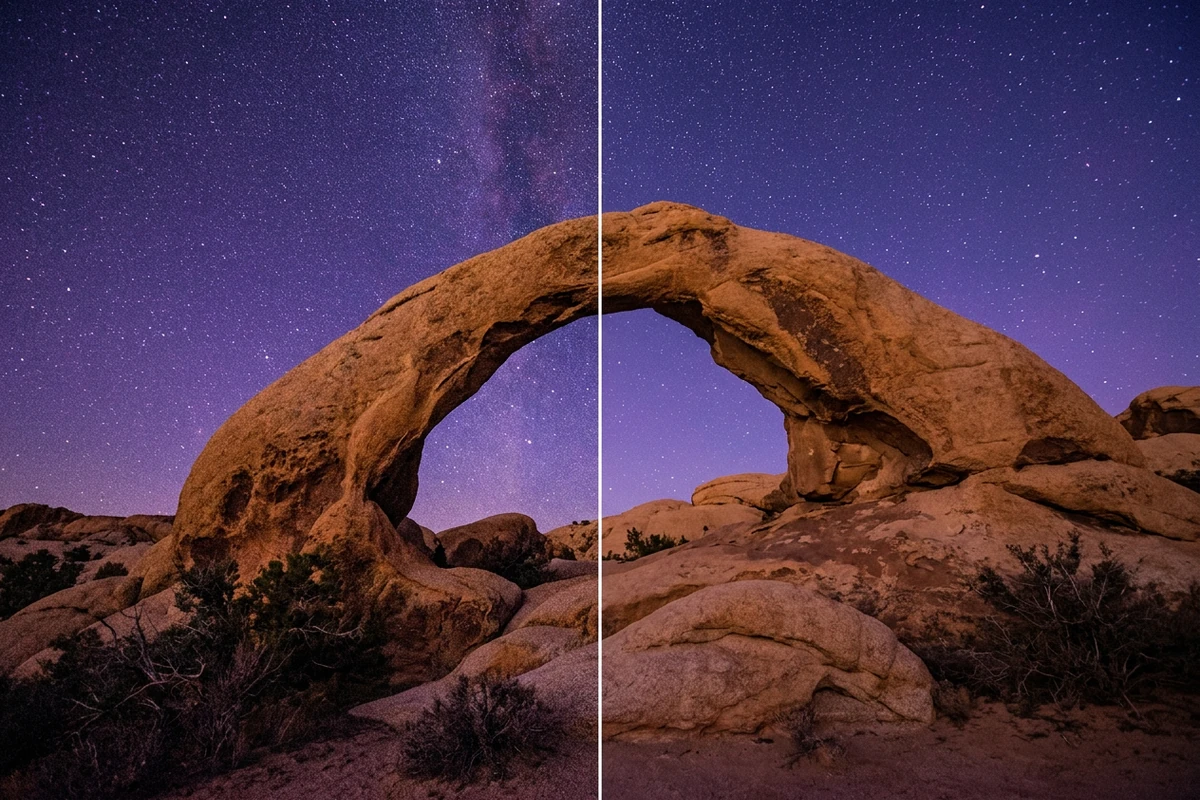
Illustrative split view of a sandstone arch beneath a purple night sky, showing heavier grain on the left and reduced noise on the right.

AI Image Denoiser

Upload a noisy photo, adjust the reduction strength, and compare the result with your original to find a useful balance between grain and detail.

Illustrative split view of a sandstone arch beneath a purple night sky, showing heavier grain on the left and reduced noise on the right.

Reduce the noise that distracts from your photo

Photo noise reduction targets unwanted grain and colored speckles, often visible in dim scenes and high-ISO photos. Aim for less distracting noise with recognizable texture, rather than a perfectly smooth surface. Use this workbench for that focused task; Photo Retouching handles separate cosmetic corrections. The comparisons below are illustrations of what to inspect, not measured Ottermind results.

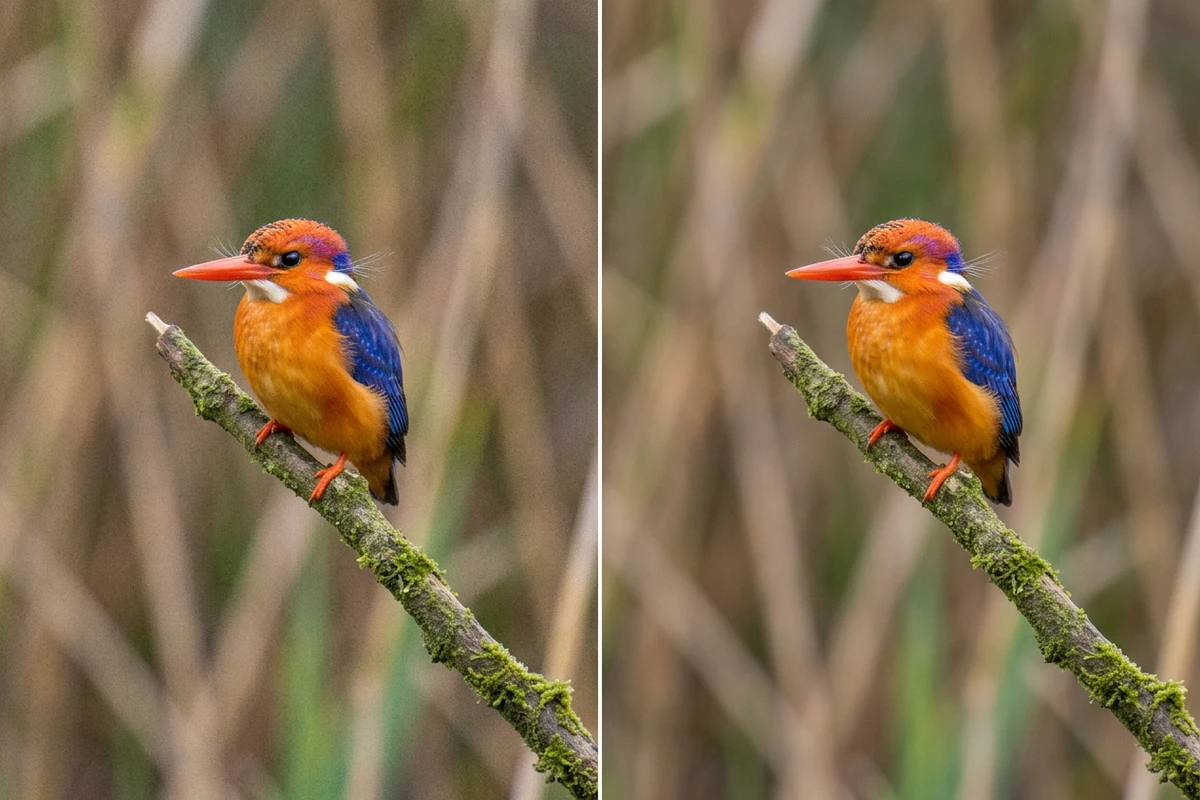
Illustrative kingfisher comparison showing visible grain on the left and less noise on the right, with feather and branch textures visible.

Keep the feather pattern, lose the distraction

A smooth background can make a wildlife photo look cleaner even when the bird has lost texture. In this kingfisher illustration, compare the feather pattern and eye as well as the background. When testing your own photo, stop increasing strength if fine feather divisions begin to merge. A little remaining grain can be the better tradeoff.
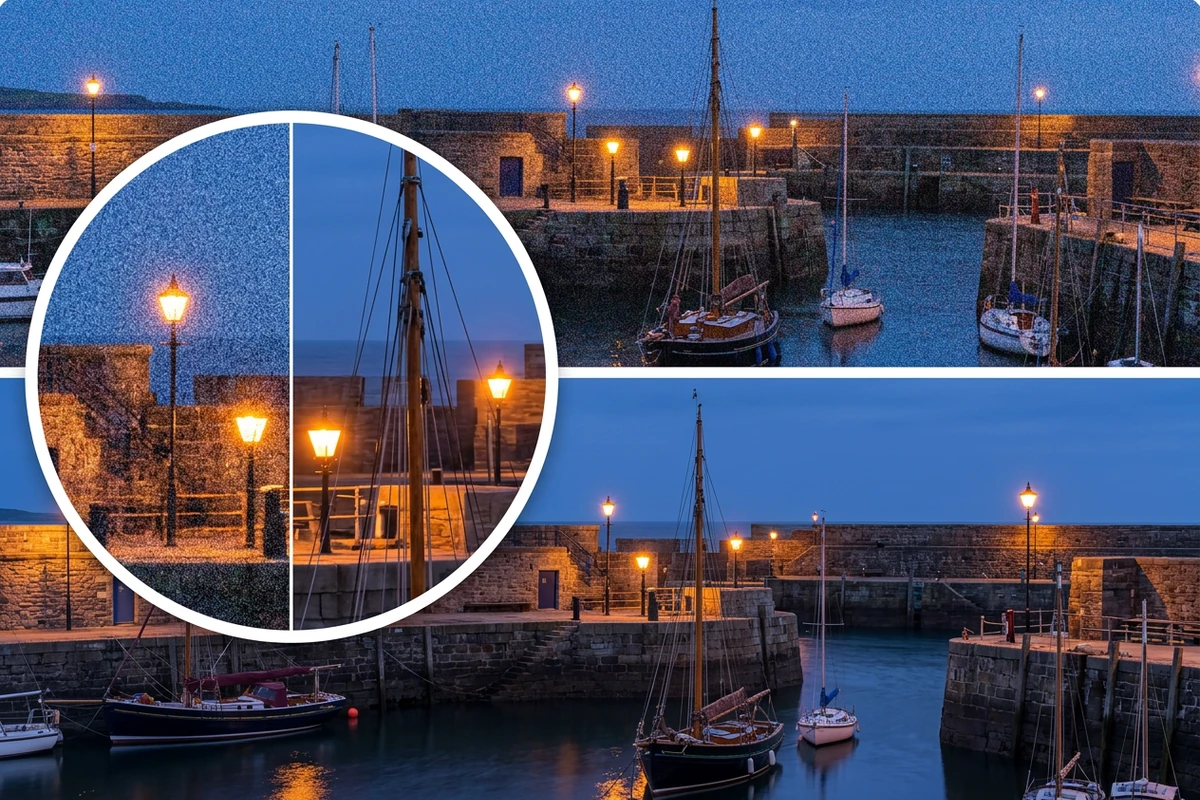
Illustrative harbor noise comparison with a grainier top view, cleaner bottom view, and a circular detail inset around lights and boat masts.

Clean dark areas without changing the night

In a harbor scene, inspect the dark sky and water alongside small lamps and thin masts. The illustration isolates a quieter noise pattern; a brighter sky is not the acceptance test. Keep the viewing scale fixed and check that tiny lights remain distinct. If you want different illumination, treat AI Image Relight as a separate edit.

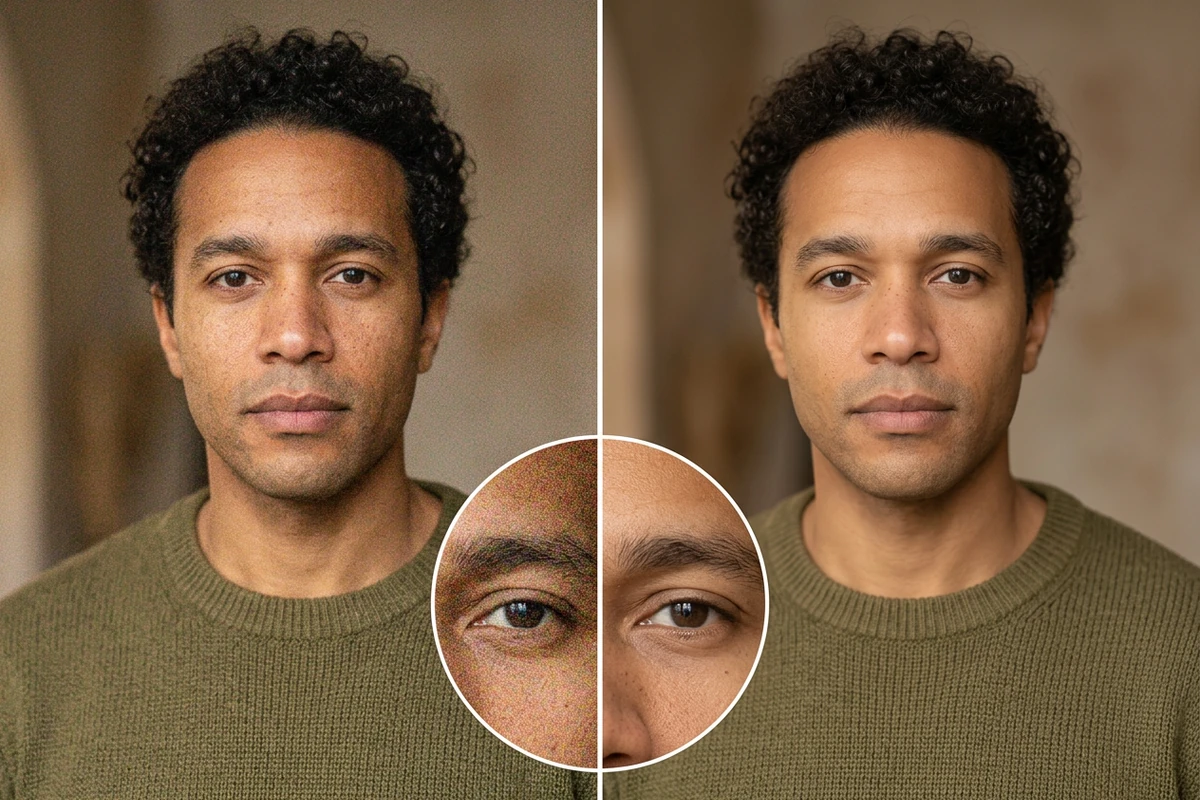
Illustrative portrait comparison of a curly-haired man in an olive sweater, with differing grain levels and an enlarged eye and skin detail.

Use skin texture as your stopping signal

Check the cheek, eyebrow hairs, and eyelid in a portrait, not just the smooth wall behind it. Start with the workbench’s middle strength. If the result looks waxy, lower Strength by one step and generate again from the original. Choose the version with less distracting speckling and credible skin texture; the portrait illustration shows the details worth comparing.

What you can do with Ottermind

Keep an indoor family photo usable

Work with a grainy birthday or dinner photograph where the moment matters more than perfect lighting. Reduce the distracting speckles, then compare faces, hair, and patterned clothing before choosing a version to share.

Prepare a wildlife crop for sharing

Use a bird or animal photo with visible high-ISO noise. Judge fur or feathers in the intended crop before removing more grain. Once the noise balance works, use AI Image Resizer for the required sharing dimensions.

Keep the atmosphere of a night trip

Review a handheld harbor, street, or campsite photo without turning night into daylight. Look for calmer dark areas while retaining recognizable signs, small lights, and silhouettes. Compare at the size your travel album will display.

Protect texture in a product photo

Reduce distracting grain in a dimly photographed knit, leather accessory, or handmade object. Check stitching, surface texture, and lettering against the original so a cleaner background does not hide changes to what you are selling.

How to denoise a photo and judge the result

Use the original as your reference and change one strength setting at a time.

1

Upload your best JPEG, PNG, or WebP. Identify one smooth noisy area and one fine texture you want to protect, such as skin, feathers, or fabric.

2

Start with the middle Strength setting, choose an output format, and review the displayed account and credit requirements. Generate a result; this workbench does not need a text prompt.

3

Compare source and result at the same scale. If texture smears, lower Strength one step and regenerate from the original. Download your preferred version, following the account notice shown.

Denoise your photo

Why creators choose Ottermind

Make noise reduction a decision you can check against the photograph, rather than a race to the smoothest result.

Adjustable strength

Vary one visible Strength control when the first result leaves too much noise or loses useful texture.

A focused task

Keep the goal on grain and speckles, with lighting, color treatment, and cosmetic changes handled separately.

A practical stopping rule

Accept some residual grain when removing more would make meaningful texture difficult to recognize.

A separate enlargement step

Review the noise balance before using AI Image Upscaler when your next task needs larger dimensions.

Visible access requirements

Check the workbench’s generation and download notices before continuing, including any account, credit, or plan requirement.

Review at the intended size

Inspect a close view for damaged texture, then judge whether noise still distracts at the final viewing size.

Frequently asked questions

Is image noise the same as blur?

No. Noise appears as grain or random colored speckles; blur spreads edges and fine detail. A photo can contain both. This page focuses on reducing noise. If the main problem is smeared edges or missed focus, consider Fix Blurry Pictures as a separate task.

Should I remove all grain from a film scan?

Not necessarily. Film grain may be part of the photograph’s character, while scanner noise is an unwanted addition. Decide which texture you want to keep before processing. Compare a small trial carefully and preserve the original scan instead of assuming every visible grain is a defect.

Can denoising recover details hidden by heavy noise?

Do not treat newly visible texture as proof of what the camera captured. When heavy noise obscures an eye, label, or fine pattern, the result may be an interpretation. Prefer a better original when accuracy matters and reject details you cannot verify.

Do I need a prompt or separate color-noise settings?

No prompt is needed in this workbench. It offers a Strength control for the denoise request, rather than separate luminance and color-noise sliders. Check grain and colored speckles in the result, then revise the strength if the tradeoff does not suit your photo.

Can I upload RAW files from my camera?

The current uploader accepts JPEG, PNG, and WebP, not camera RAW files. Export a good-quality copy if needed and keep the RAW original. Avoid repeatedly saving a compressed copy; blocky compression damage and sensor noise are different problems and may need different treatment.

Is photo denoising and downloading free?

Follow the requirements shown in the workbench for your account and current edit. Generation can require sign-in and credits, and downloading can depend on your plan. Check those notices before starting instead of assuming unlimited attempts or free downloads.

Discover more

More from the blog

Find a cleaner balance for your photo

Bring your noisy original, choose a starting strength, and compare the textures that matter. Keep the version that reduces distraction without sacrificing the details you recognize.

Denoise your photo